Before you touch a setting
Spend ten minutes gathering these items. It prevents the stop-start loop that makes a simple setup feel much longer.
| Your HighLevel mental model | Full path in Votel |
|---|---|
| Agency branding | Settings → SaaS Configurator → Branding |
| White-label and API domains | Settings → SaaS Configurator → Custom Domain |
| SaaS Configurator plans | Settings → SaaS Configurator → SaaS Plans |
| Stripe and SaaS Mode checkout | Settings → SaaS Configurator → Signup Form |
| Location accounts | Settings → Sub-Accounts |
You have the roadmap. Unlock the exact execution.
Join Votel through Fer’s affiliate link and get the complete implementation kit, including every screenshot, checklist, agent prompt, and the printable guide.
- ✓Complete five-stage setup SOP
- ✓Guarded DNS and Stripe agent prompts
- ✓SaaS pricing and margin worksheet
- ✓Client launch QA checklist
- ✓Downloadable eight-page PDF
- ✓Future agency resources Fer builds
Brand the platform
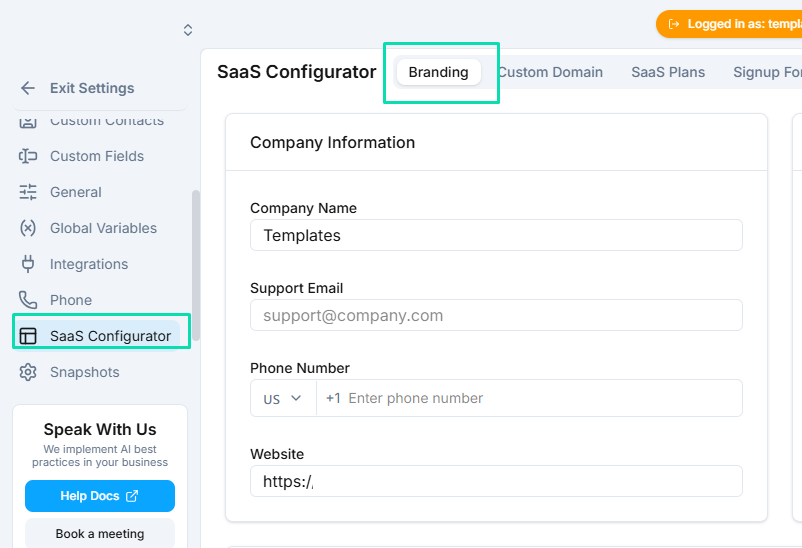
- Enter the company name, support email, phone number and website clients should see.
- Upload the primary logo, then adjust its height and fit so it reads clearly in the sidebar.
- Upload a dark-mode logo, favicon and square app icon. Preview each at small size.
- Add social links only if they belong in client-facing email footers.
- Paste your support-widget embed code if you want help chat inside every client account.
- Decide whether to show “Powered by,” live support and feedback buttons, and whether sub-accounts may change branding.
- Click Save Branding Settings, refresh the page and inspect both light and dark modes.
If you are coming from HighLevel: this is the agency-level brand layer. Choose the identity you want every client workspace to inherit before you create or invite clients.
Copy the branding-prep AI prompt
Prepare my Votel white-label brand checklist from the company details, colors, and logo files I provide. Check for a light-background logo, dark-background logo, favicon, and 512x512 app icon. Flag missing, low-resolution, or unreadable assets and recommend filenames and dimensions. Draft concise client-facing support details without inventing information. Do not upload or change anything. Return a table marked Ready, Needs work, or Missing.
Connect your branded domain
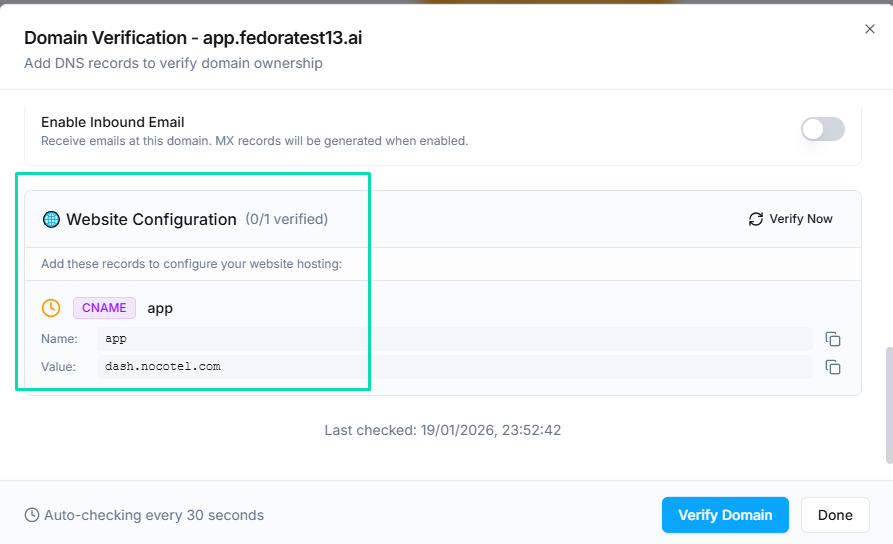
- Choose a clear client-facing subdomain such as
app.yourbrand.comorportal.yourbrand.com. - Click Add Domain, enter the full subdomain and open its setup panel.
- In a second browser tab, open the DNS manager for the root domain. Do not change nameservers.
- Add the website CNAME and every verification record exactly as Votel displays them. Leave TTL on Auto unless your provider requires a value.
- If you want system email to come from your domain, turn on email and add the exact SPF, DKIM, DMARC and routing records Votel provides.
- Return to Votel and click Check. If a record is pending, compare host/name, type and value character by character.
- Only enable inbound email routing if you intentionally want replies handled there and you understand how it interacts with your existing mail provider.
Copy the guarded DNS-agent prompt
Help me add the exact DNS records copied from my Votel account. First, create a change plan and check for conflicts with existing CNAME, SPF, DKIM, DMARC, MX, or routing records. Never invent values, change nameservers, or delete or overwrite records. If SPF already exists, stop and explain that it may need to be merged. If operating my browser, pause before every save and show Type, Host, Value, TTL, and impact. I will handle login, MFA, secrets, and final approval. After approval, verify each record and return a results table.

My DNS provider: [PROVIDER]
My intended subdomain: [SUBDOMAIN]
Exact records copied from Votel:
[PASTE RECORDS HERE]
Build the plan clients will buy
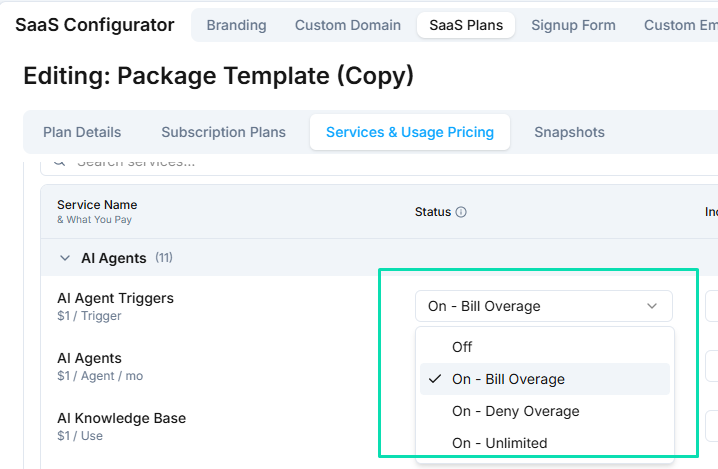
- Start with one sellable plan. Give it a client-friendly name and a one-sentence outcome, not an internal code.
- Choose monthly, quarterly or annual billing. Add a setup fee or trial only when it matches your sales process.
- For each service, choose Unlimited, Pay-Per-Use, Deny Overage or Off.
- Use Votel’s 2X Markup control as a starting point, not a substitute for margin math. Include support, onboarding and payment fees in your model.
- Add one-time credits if clients need a safe starting balance immediately after signup.
- Review the sub-account defaults, then publish the plan only after checking every included service and unit price.
| Mode | What the client experiences | Use it when |
|---|---|---|
| Unlimited | Included with no metered retail charge. | You have modeled the underlying cost and acceptable-use risk. |
| Pay-Per-Use | Usage is charged at your configured unit price. | Consumption varies and you want margin tied to usage. |
| Deny Overage | Usage stops at the plan limit. | A hard budget boundary is more important than continuity. |
| Off | The service is unavailable. | The feature does not belong in this tier. |
Copy the SaaS-plan modeling prompt
Draft a Votel SaaS plan from the costs, limits, support workload, payment fees, target customer, and desired margin I provide. Show assumptions. For each service, recommend Unlimited, Pay-Per-Use, Deny Overage, or Off and explain the risk. Calculate break-even and margin at low, expected, and high usage. Do not publish or change anything. Return one plan table and the decisions I must approve.

Target customer: [DESCRIBE]
Monthly platform cost allocation: [AMOUNT]
Usage costs: [PASTE]
Included support/onboarding cost: [AMOUNT]
Desired margin: [PERCENT]
Services I want to include: [LIST]
Connect Stripe and open signup
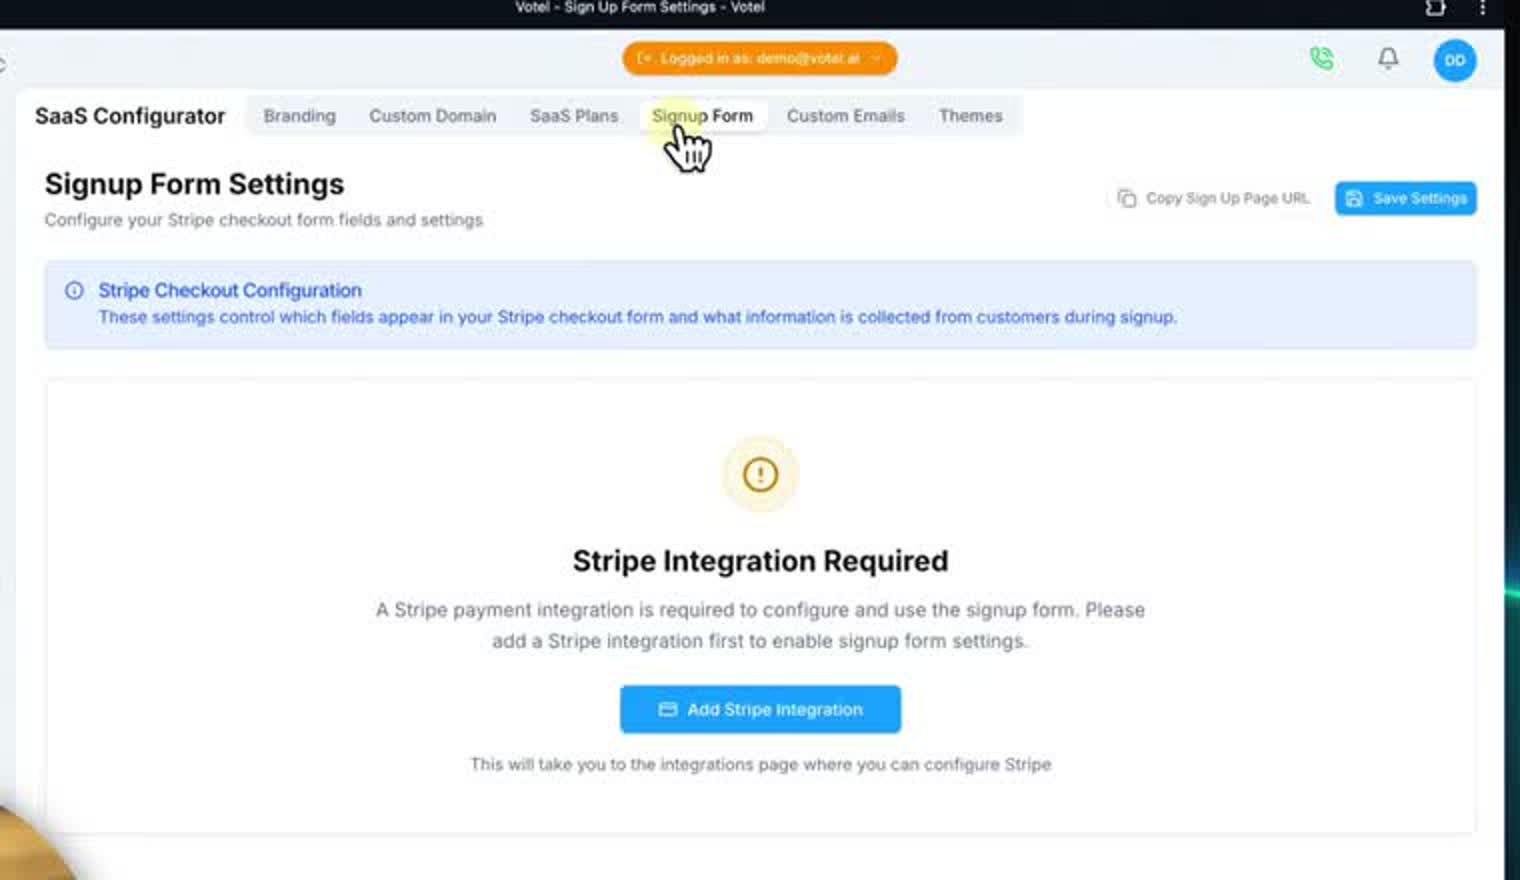
- Confirm the custom domain is active and at least one sellable SaaS plan is published.
- Click Connect Stripe and choose the Stripe account that should receive client payments.
- Complete Stripe authentication, permissions, identity and business confirmations yourself.
- Return to the signup form, choose the plan or plans clients may buy and configure the required checkout fields.
- Copy the hosted signup URL and open it in a private browser window.
- Inspect the logo, domain, price, billing interval, fields, legal links and mobile layout before sharing it.
Copy the Stripe setup assistant prompt
Guide me through connecting Stripe to Votel and checking the hosted signup page. First confirm the Stripe business, live/test mode, approved plan, billing interval, checkout fields, support contact, policies, legal links, and test email. You may navigate, but stop for login, MFA, identity, banking, tax, permissions, payment data, publishing, or final approval. I will complete those actions. Never request secrets or create a live charge, change payouts, disconnect Stripe, issue a refund, or publish without explicit approval. Finish with private-window QA and a list of what I confirmed.
Create one test client account
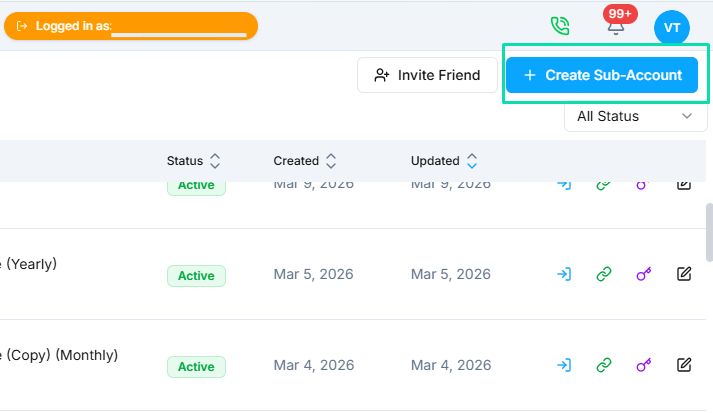
- Click Create Sub-Account. Do not confuse this with Votel’s separate “Invite Friend” referral action.
- Use a controlled test email, assign the plan you built and create the account.
- Use Login as to inspect exactly what a client sees.
- Verify the brand, domain, theme, enabled services, usage limits, support links and system email.
- Generate a login link and test it in a private browser window. Treat login links as sensitive and short-lived.
- Confirm the account and subscription appear correctly in the Sub-Accounts list and billing/contact view.
If you are coming from HighLevel: think of this as your controlled location-account test. Prove the inherited agency configuration before a real customer encounters it.
Copy the launch-QA agent prompt
Run read-only QA using only my test Votel sub-account. Check the branded HTTPS URL, company name, logos, favicon, theme contrast, support details, services, plan, limits, welcome email, login link, mobile layout, and billing display. Do not invite clients, send messages, create charges, change plans, expose login links, or deactivate or delete anything. Mark each item Pass, Fail, or Not Tested with evidence and a fix. Stop for authentication, MFA, financial, destructive, or customer-facing actions.
The ten-minute launch check
Do this once from a private browser window and once from your phone. If every item passes, the basic white-label path is ready for a controlled client launch.
- Branded HTTPS URL loads
- Logo works in light and dark mode
- Support details belong to your agency
- Correct plan and interval appear
- Usage modes match your pricing
- Stripe receives the payment path
- Welcome email uses your identity
- Test sub-account gets correct access
- Login link opens the right workspace
- Mobile signup remains readable
Questions agency owners ask
How long should I budget?
Plan on about 60 minutes when your brand assets, domain access, Stripe account, and pricing decisions are ready. Allow up to two hours for a careful first setup and testing. DNS may verify in minutes, but Votel’s documentation notes that propagation can take up to 48 hours. That is waiting time, not active setup work.
Do all five steps live in the SaaS Configurator?
Branding, Custom Domain, SaaS Plans and Signup Form do. Client Sub-Accounts has its own Settings menu item.
Can an AI agent do the whole setup for me?
It can prepare assets, model plans, draft DNS changes and perform structured QA. Keep login, MFA, secrets, Stripe identity and banking, final financial approvals, destructive actions and production client communication under human control.
Should I turn on inbound email routing?
Only if you intentionally want replies handled through the configured Votel route and have checked the effect on your existing email provider. Outbound branded system email and inbound mailbox routing are separate decisions.
What should I launch first?
One plan and one controlled test account. Additional tiers, advanced theming and automation can follow after the core signup-to-login path is proven.
Primary sources: Votel’s White Label overview, SaaS Configurator, Custom Domain, SaaS Plans, Signup Forms, Sub-Accounts, and the official walkthrough. Verified September 13, 2026. Interface labels can change; use the live values in your account. All Things Votel is independent and not affiliated with Votel.ai.