This is the master 2026 Votel.ai overview. Use its four table-of-contents phases to plan the work, then complete the steps in the order shown in the guide body. White label is grouped with business organization because it defines your agency presentation, but its detailed implementation stays in the agency branch after the core customer journey works. Deeper guides are linked wherever one section would become too long.
AI-assisted setup is optional
Connect ChatGPT, Claude or another compatible assistant through Votel’s MCP server. It can work across the workspace in plain English, while you review and approve every change.
Your agency can work here
Manage your own contacts, conversations, agents, phone, email, workflows, calendars and reporting in the main account.
Add these when needed
Create a separate workspace for each client you deliver Votel to. Apply access, branding, plan and pricing rules from the parent account.
HighLevel agencies commonly create a separate location for their own business. In Votel, the parent workspace is also operational, so your agency can use the same core CRM and communication tools without making an extra internal client account.
Make the account safe, understandable and useful.
Start with ownership, permissions and clean customer data before connecting outbound channels.
Secure and personalize your account
Set your identity, timezone, default channels and access controls before your team starts working.
- Confirm your name, timezone, language and country.
- Add your signature and default email or SMS channel.
- Enable two-factor authentication.
- Invite only the teammates who need access and review their roles.
Your profile is accurate, 2FA is on, and every active user has the smallest practical level of access.
Understand where your work belongs
Use the main workspace for your agency. Create client sub-accounts only for separate client delivery.
- Write down whether you are setting up your own business, a client, or both.
- Keep your agency contacts and operations in the main workspace.
- If you serve clients, plan one separate sub-account per client.
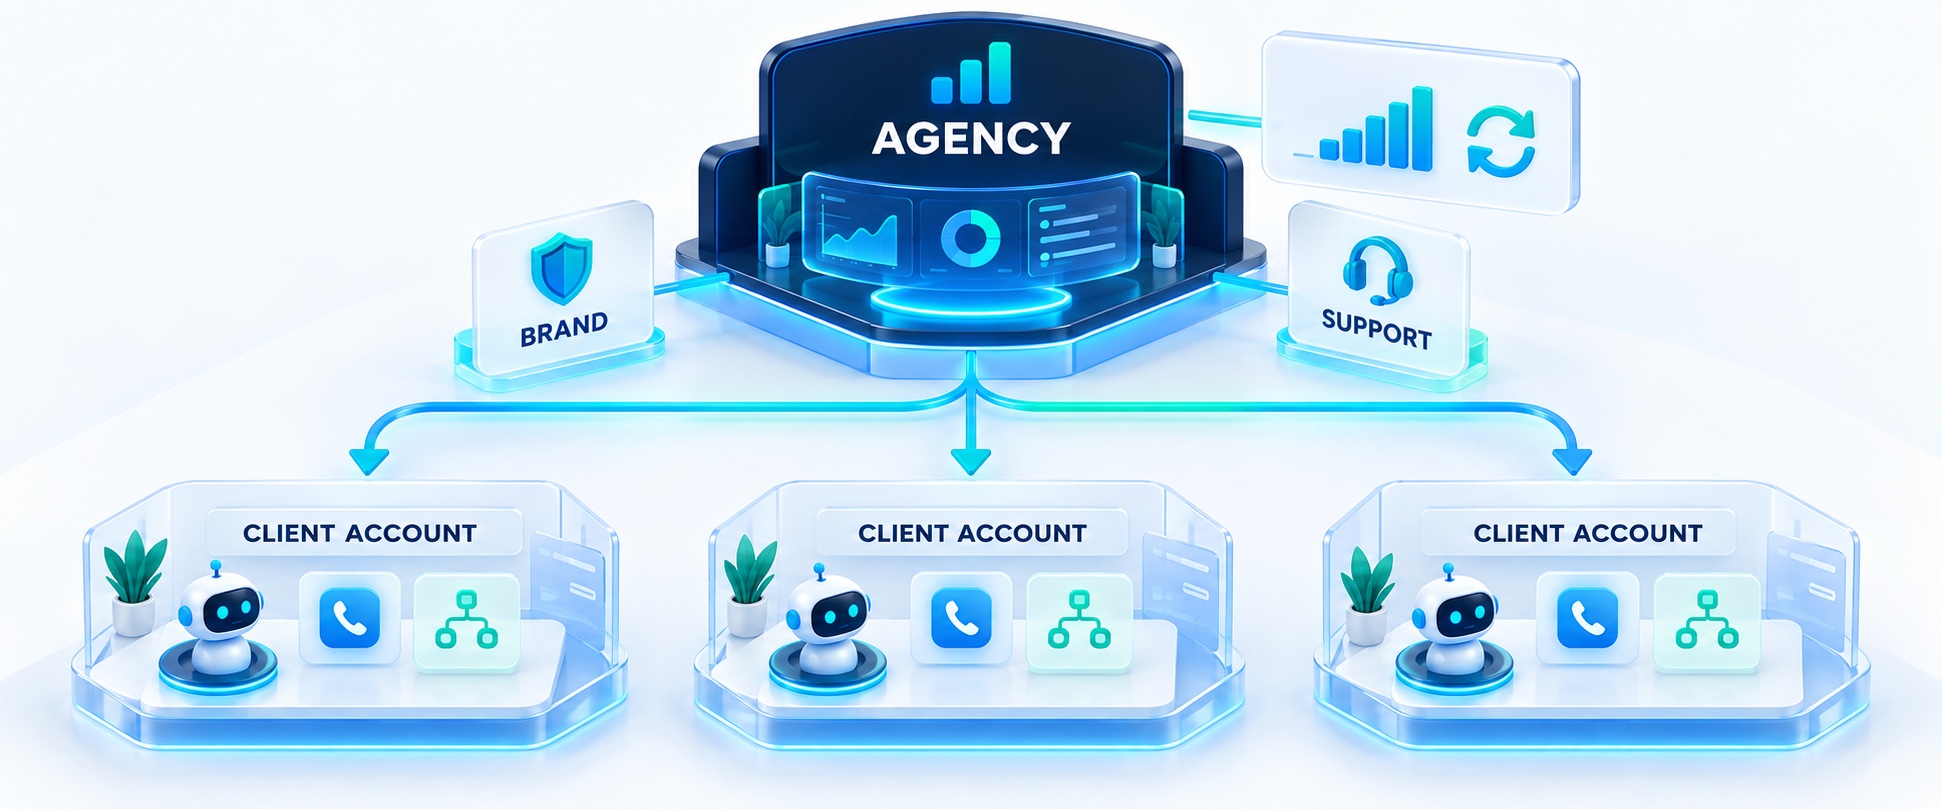
You know exactly which data belongs in the main workspace and which future client data belongs in a sub-account.
Build a clean CRM foundation
Decide what makes a contact unique, what your team needs to see and how a lead moves through the pipeline.
- Turn on contact deduplication and choose reliable uniqueness rules.
- Review lead scoring and deliverability protections.
- Create only the custom fields required for your first customer journey.
- Build five to seven meaningful pipeline stages and move a test contact through them.
Ask it to propose and create a small CRM structure from your real sales process, then review every field and stage before using it.
Build a draft CRM pipeline for [BUSINESS TYPE] with no more
                  than seven stages. Add only the contact fields needed for
                  [CUSTOMER JOURNEY]. Show me the plan first. Do not delete or
                  rename existing fields or stages without approval.
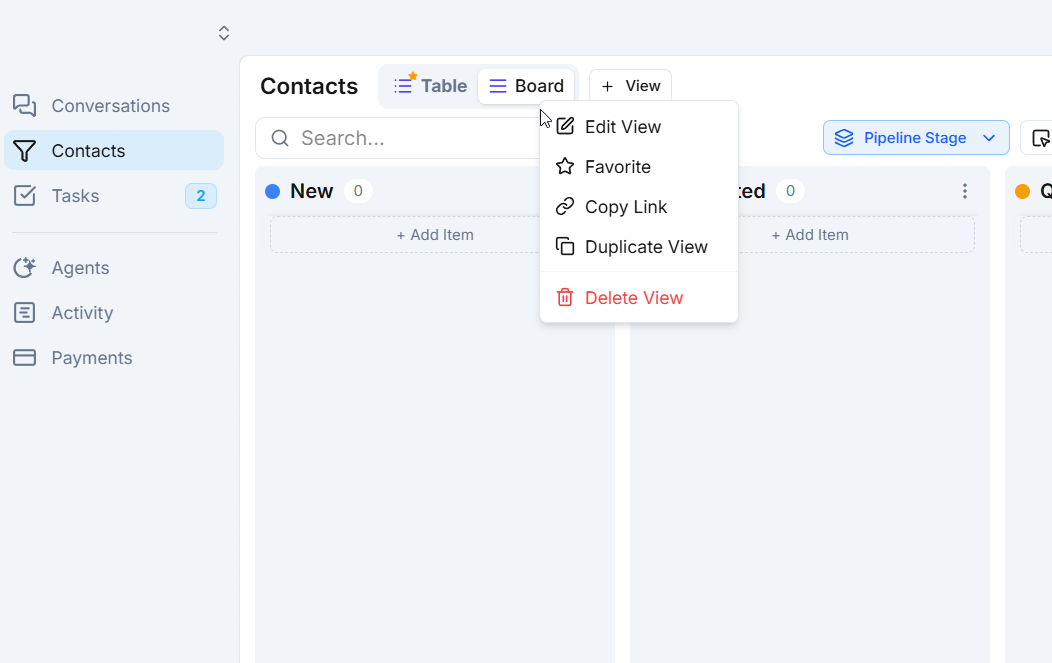
A test contact can be created once, viewed clearly and moved through a real sales journey.
Connect the domain, identity and sending path.
Email setup is three related jobs. Treating them separately makes troubleshooting much easier.
Connect your email domain
Authenticate a domain so Votel can send branded email with SPF, DKIM and DMARC protection.
- Click Add Email Domain and enter the sending domain.
- Copy each account-specific DNS record exactly.
- Add the records at your DNS provider without deleting existing mail records.
- Return to Votel and refresh until verification succeeds.
Do not replace nameservers, delete MX records, or create a second SPF record. DNS changes can take time to propagate.
The domain status is verified in Votel.
Create sender identities and reply paths
Choose what recipients see and where replies should arrive.
- Create a sender such as Your Name from Your Agency at a branded address.
- Share the identity with the correct team members.
- Set the default sender in your profile if appropriate.
- Send a test and reply to it from an outside inbox.
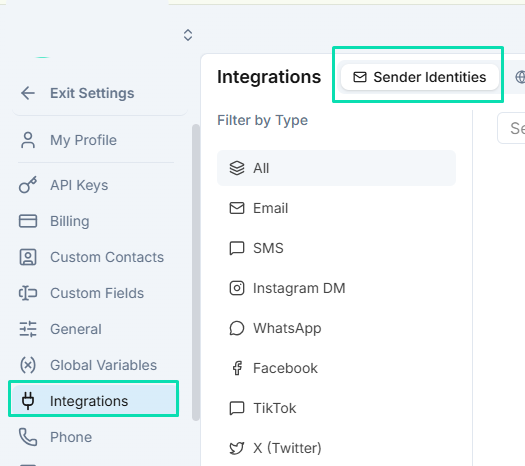
A verified sending identity does not automatically configure inbound mail. Confirm forwarding or MX behavior for the address you expect people to reply to.
The message arrives with the correct From name and a reply lands in the expected inbox or conversation.
Choose your email integration
Votel supports several sending providers. Choose the built-in sender when you want the Email Agent to manage timing, pacing and deliverability behavior.
Use the system-provided sender when campaigns will run through the Email Agent. It is the only path that supports the agent’s warmup, wave sending, engagement tiers, per-contact send timing and safety controls.
The current system default may be Mailgun-backed, but it is managed by Votel. This is different from connecting your own Mailgun account.OAuth connection for sending through a Google mailbox.
Bring your own Mailgun account and sending configuration.
Use an existing SendGrid email-delivery account.
Bring your own Amazon SES account and credentials.
Connect another provider with your own host, port and credentials.
Using Email Agents? Choose the Votel built-in sender. Need an existing mailbox or provider for manual and workflow email? Gmail, Mailgun, SendGrid, AWS SES or Custom SMTP may fit, but they do not unlock the Email Agent’s full sending system.
- Choose the sending path that matches the job.
- If using the Email Agent, select the system-provided built-in sender.
- Set warmup, wave sending, engagement tiers and sending windows conservatively.
- Review safety thresholds and bounce protections.
- Send a small internal test before using real contacts.
The campaign composer blocks Email Agent campaigns from using a self-connected sender because the agent cannot provide its promised timing and delivery controls on that path.
You selected the right provider for the use case and a controlled test sends without a bounce or unexpected reply path.
Give customers a reliable way to call, text and book.
Confirm routing and compliance before connecting a phone number to automation.
Buy and route a phone number
Choose a number, decide who answers it and prove both inbound and outbound calling work.
- Search by country and area code and review capabilities and recurring cost.
- Choose Web Phone, an AI agent or a forwarding number as the destination.
- Configure outbound caller ID and voicemail.
- Call in from an outside phone, then place one outbound test call.
Inbound and outbound calls use the intended number, destination and caller ID.
Complete SMS and 10DLC compliance
Register the business and campaign before using a US local number for application-to-person texting.
- Confirm the legal business information and tax ID.
- Describe the messaging use case accurately.
- Provide opt-in language, sample messages and STOP/HELP behavior.
- Submit and wait for carrier review before launching outbound SMS.
Buying a number does not make every message compliant. Consent, registration, truthful campaign details and opt-out handling still matter.
The required registration is approved, or you have documented that SMS will remain off until approval.
Connect and style your calendar
Connect real availability, apply your branding and test the full guest experience on mobile.
- Authorize the correct external calendar.
- Set availability, duration, buffers, timezone and booking window.
- Customize the layout, theme and required questions.
- Book a test appointment from a phone and confirm both host and guest notifications.
Votel’s calendar theming and mobile presentation are strengths. Treat the booking page as part of the brand, not a back-office utility.
A test appointment appears in both systems with the right time, questions and notifications.
Connect only what your first journey needs.
Votel supports a broad integration catalog. Start small, prove value, then expand.
Connect essential integrations
Choose the calendar, payment, analytics, messaging or CRM connections that directly support your first live workflow.
- List the systems involved in one customer journey.
- Connect only those systems and use the smallest practical permission scope.
- Run a test that confirms data flows in the intended direction.
Every connected app has a clear purpose and has passed one real data test.
Connect your AI assistant through MCP
Give ChatGPT, Claude or another compatible assistant controlled access to help build and manage the Votel workspace.
- Choose remote OAuth for a supported hosted assistant, or local API-key access for a desktop or coding client.
- Create a clearly named credential with the minimum role needed.
- Never paste a production secret into a public prompt, screenshot or guide.
- Start with a read-only request such as List my websites or List my contacts.
- Ask the assistant to explain its proposed changes before allowing write actions.
Use an inventory request before asking the assistant to build anything.
Audit this Votel workspace for setup completeness. List what
                  exists for CRM, forms, agents, workflows, email, phone,
                  calendars and integrations. Do not create, edit, publish,
                  purchase, invite, delete or activate anything. Give me a
                  prioritized setup plan and ask for approval before each write
                  action.
The live tool list is always available under Settings → API /
MCP → MCP Tools.
Official Votel documentation lists 290+ tools across CRM, agents, workflows, forms, websites, scheduling, email, phone activity, dashboards, settings, branding and sub-accounts.
Your approved assistant can perform one safe read-only action, the credential is secure, and write actions require a clear review habit.
Build one complete path before building everything.
A working path from entry to response to CRM outcome teaches you more than a dozen half-finished features.
Build and test your first AI agent
Give one agent one job, a clear tone, verified knowledge and a human handoff.
- Name the role and define one measurable outcome.
- Write identity, tone, rules, FAQs and escalation instructions.
- Choose a model and voice, then test in both chat and voice mode.
- Test a normal request, unclear answer, prohibited request and human handoff.
Let it create a draft agent and workflow from verified business information, then audit the prompt for missing facts and risky claims.
Create a draft [ROLE] agent for [BUSINESS]. Its only outcome
                  is [OUTCOME]. Use only the verified facts I provide. Mark
                  missing information clearly, include a human handoff, keep it
                  inactive, and give me a test plan before activation.
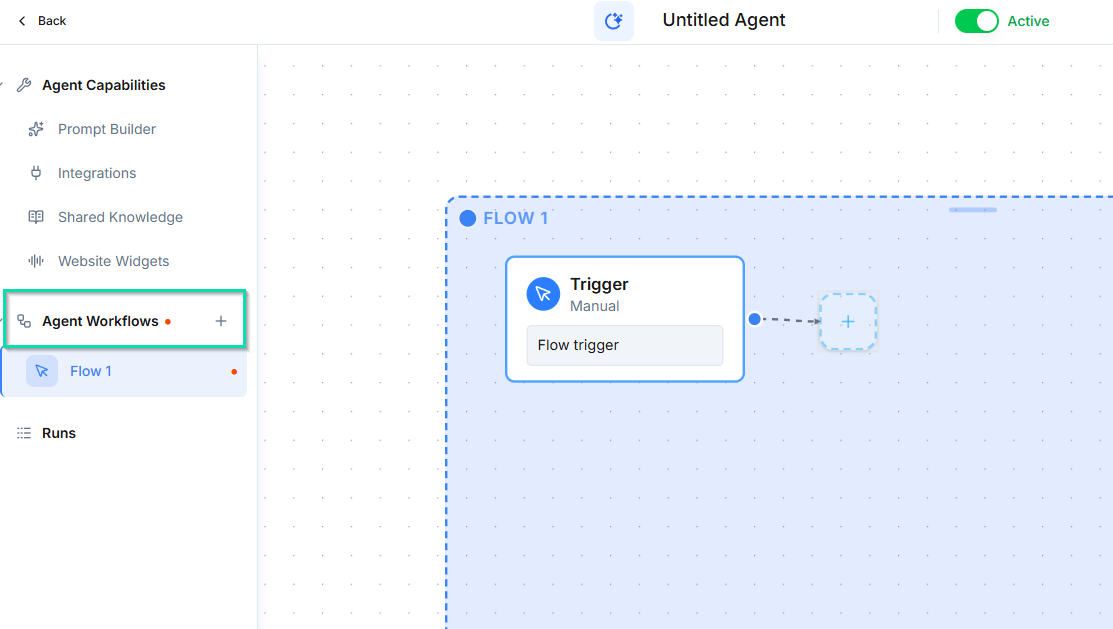
Use the Build Your First AI Agent guide for prompt anatomy, channels and detailed testing.
The agent passes four test conversations and escalates correctly.
Create one form and one workflow
Capture a real lead, save the right fields and trigger a useful next action.
- Create a short form with only the fields the next action needs.
- Publish it and submit a test from an outside browser.
- Create a workflow trigger for the form submission or another clear event.
- Add a useful next action such as a task, email, SMS, call or pipeline update.
- Inspect logs and verify each value landed correctly.
This is one of the strongest uses. It can build the form, map fields and create the workflow while you approve the customer experience and final publishing.
Create a draft lead form for [OFFER] that collects only
                  [REQUIRED DATA]. Map each answer to the correct contact field.
                  Then create an inactive workflow that [DESIRED ACTION]. Do not
                  publish, send messages or activate anything until I review the
                  form, mappings and workflow diagram.
A real test entry creates or updates the right contact and completes the intended follow-up.
Run the complete customer journey
Test the experience exactly as a customer would, from first touch through the final CRM result.
- Enter from the public form, calendar, phone number or widget.
- Use real-looking test details and complete the conversation.
- Confirm the contact, conversation, custom fields, pipeline stage and activity log.
- Confirm the customer-facing email, SMS, booking or handoff.
- Repeat once on mobile.
The five-point proof
You can show the full working journey without explaining away a missing step.
Brand, package and deliver Votel to clients.
Skip these steps if you are using Votel only for your own business.
Configure your white-label experience
Set the brand, custom app domain, client access, plans, billing and interface theme before inviting a client.
- Configure Branding, Custom Domain and Themes.
- Decide which features client sub-accounts can access.
- Create plans and service pricing, then connect Stripe if you will bill through Votel.
- Test the signup and login experience in a private window.
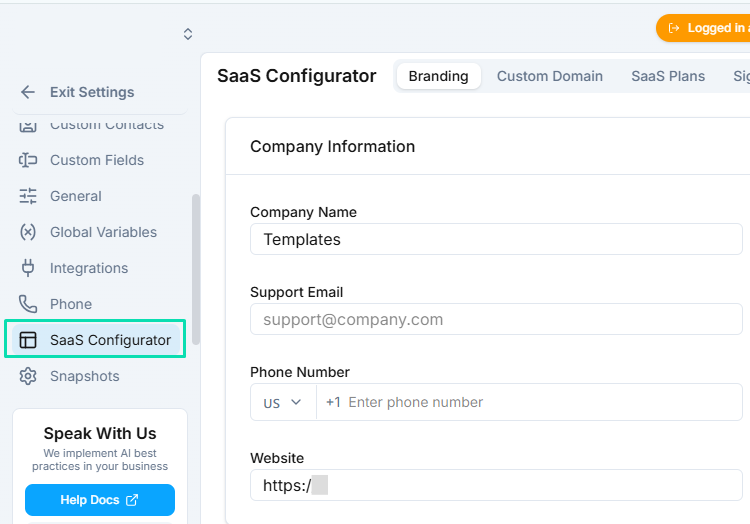
Follow the White-Label Agency Setup guide for exact DNS, Stripe, plan and launch checks.
A private-window test shows the correct brand, domain, plan and client access.
Create and launch your first client sub-account
Provision one client, complete its operational setup and prove that the client sees only what you intended.
- Create the client account with the correct owner and plan.
- Switch into the client account and configure its CRM, agent, email, phone, calendar and forms.
- Invite a test client user and confirm permissions.
- Run the same end-to-end customer journey from inside the client account.
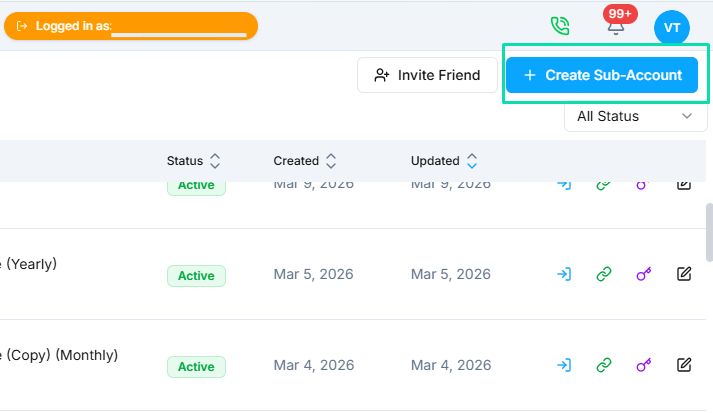
Follow Launch Your First Sub-Account for the complete ten-step client checklist.
The client can log in, see the intended features and complete one real customer journey.
Your Votel account is ready when…
You do not need every feature configured. You need a safe account and one reliable customer journey.